
Source code, 3D models and documentation on
GitHub (ggodefroid/volets).
When I moved into my first student apartment in Paris, I quickly discovered that high rent rarely comes with modern comfort. I automate everything I can with Home Assistant, but the daily chore was the windows: heavy roller shutters operated by stiff, manual crank handles. Cranking them open every morning and rolling them down every evening across the apartment quickly got on my nerves.
Automating them was an obvious move, but being a tenant came with strict constraints. I could not drill into the window frames, cut into the walls, or alter the building in any permanent way—the entire setup had to be 100% reversible and leave zero traces when moving out. On top of that, as a student with a limited budget, expensive commercial retrofit kits were out of reach, and whatever the built needed to be modular enough to be reused in another apartment later on in case if I change.
The default suggestion everyone gave me was to tear down the shutter box and slip a 230V tubular motor inside the rolling axle. While that works well when owning the place, it was completely unrealistic for me. Taking apart sealed, painted shutter casings in a rental carries a serious risk of damaging the trim and losing my security deposit. These motors are also pricey (around 100€ each plus mains electrical work), and because axle profiles and window widths vary between buildings, a motor cut to size for this flat would be useless in the next one.
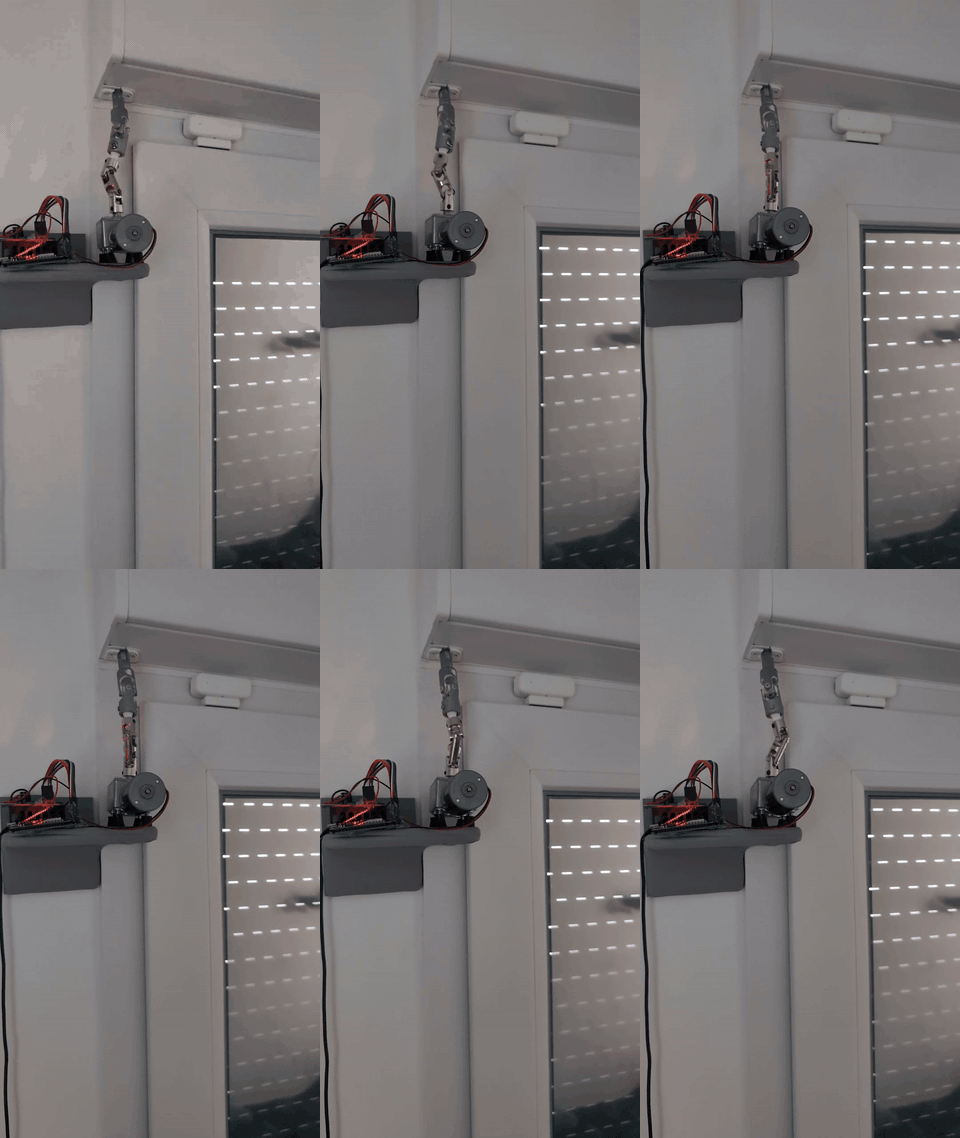
Instead of modifying what sits inside the box, the better approach was to leave the shutter mechanism completely untouched and drive the original manual crank inlet directly from the outside.
Lifting heavy shutters requires serious torque at low rotation speed, so I used a 5840-31ZY 24V DC worm-gear motor spinning at 53 RPM. Its internal gear reduction produces plenty of mechanical torque to turn the crank inlet effortlessly. The biggest perk of a worm drive is that it is naturally self-locking: the worm screw turns the gear, but the gear cannot back-drive the screw. When power is cut, the weight of the shutter physically cannot turn the shaft, meaning it holds its position firmly under gravity with zero watts consumed at rest and no brake required.
To link the motor to the shutter, two chained 8 mm universal-joint couplers absorb the angular misalignment between the wall-mounted motor and the angled crank socket. Rubber standoffs between the motor and the bracket dampen vibrations so the wall doesn't amplify the motor noise. Everything is held together by custom 3D-printed parts modeled in CAD: a wall bracket and a shaft adapter that slips right onto the crank inlet.
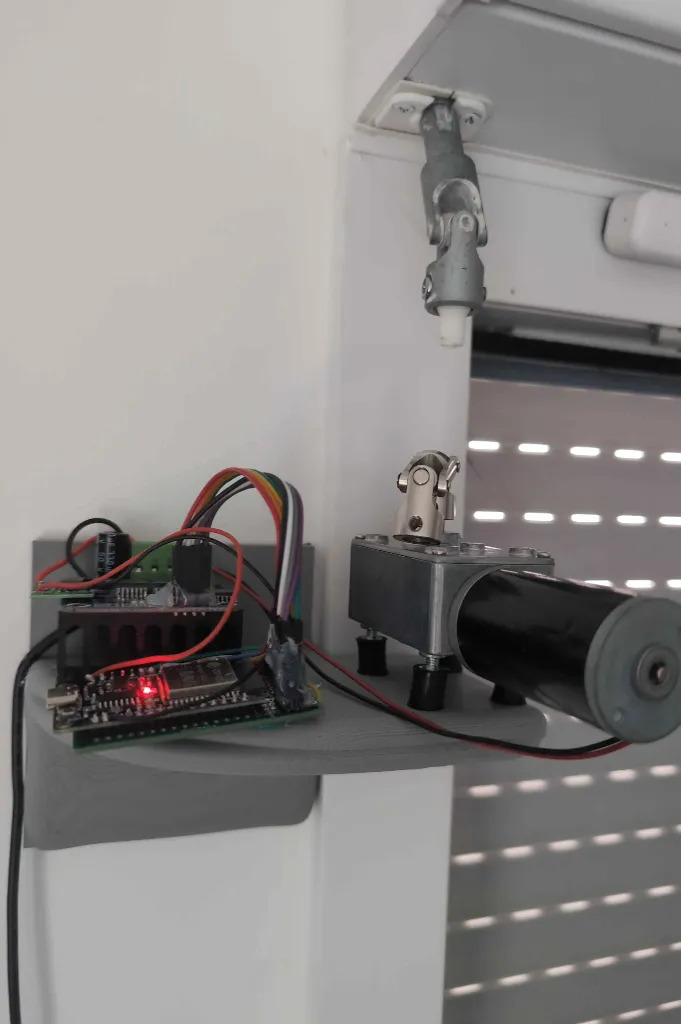
For the electronics, power and direction are handled by a BTS7960 (IBT-2) 43A motor driver, which drives the 24V motor smoothly with PWM. The brains of the setup is a generic 30-pin ESP32 running ESPHome, providing native, fully local integration with Home Assistant over Wi-Fi without any cloud dependency.
Instead of sticking fragile limit switches or reed sensors onto the window frames, the system detects end stops purely through motor current. The BTS7960 driver features analog current-sense outputs (R_IS and L_IS) wired straight to the ESP32 ADC inputs.
ESPHome samples the current 100 times per second. During regular travel, the current draw stays low and steady. As soon as the shutter hits the top stop or rests against the bottom sill, the motor physically stalls, causing a sharp current spike. The firmware catches this spike within tens of milliseconds and immediately cuts bridge power.
To prevent continuous mechanical stress on the worm gears and 3D mount, the firmware automatically pulses the motor in reverse for X seconds right after detecting a stall, gently relieving the tension. A 90-second safety watchdog is also built in to stop the motor if no stall is detected. Everything is exposed to Home Assistant as a standard cover entity, alongside real-time current monitoring, configurable current thresholds saved to flash memory, and manual sync buttons.
To keep this page simple and avoid clunky diagrams, I documented all detailed schematics, pinout tables, and wiring notes directly on GitHub. The complete pinout and electrical diagram are in my wiring guide on GitHub.
Having validated the setup on a first window, the plan is to automate all shutters across the three rooms of my apartment. Plugging separate 230V power bricks near every window would be messy, clutter scarce wall outlets, and multiply standby power consumption.
The clean, scalable solution is a centralized 24V 20A industrial power supply, feeding a dedicated 24V DC bus line routed along baseboards to each room. Distributing 24V rather than 5V or 12V drastically reduces current, keeping voltage drop negligible over 10 to 15-meter runs across the apartment. Moreover, 24V DC is touch-safe Extra-Low Voltage, making it safe and compliant for surface trunking in a rental.
The 20A capacity provides ample headroom to handle motor inrush and stall currents across multiple windows at once. Each window retains its own local ESP32 node and step-down buck converter, allowing stall detection and safety shutoffs to run autonomously on-device even if the Wi-Fi drops, while Home Assistant coordinates morning routines, summer solar heat protection, and vacation presence simulation.
I published all my esphome yaml configurations, bill of materials, 3D printable STL files, and wiring details on the GitHub repository, including my ESPHome YAML config, the 3D print files, and the complete bill of materials.